Overview
This document outlines how to implement proxy integrations with FirstPromoter to ensure reliable tracking even when ad blockers are present. By leveraging a proxy setup, you can maintain accurate affiliate tracking and conversion attribution while minimizing the impact of ad blocking technologies.The Challenge with Ad Blockers
Ad blockers and privacy tools can interfere with affiliate tracking in several ways:- Blocking tracking scripts from loading
- Preventing cookies from being set
- Blocking HTTP requests to domains identified as tracking services
- Stripping tracking parameters from URLs
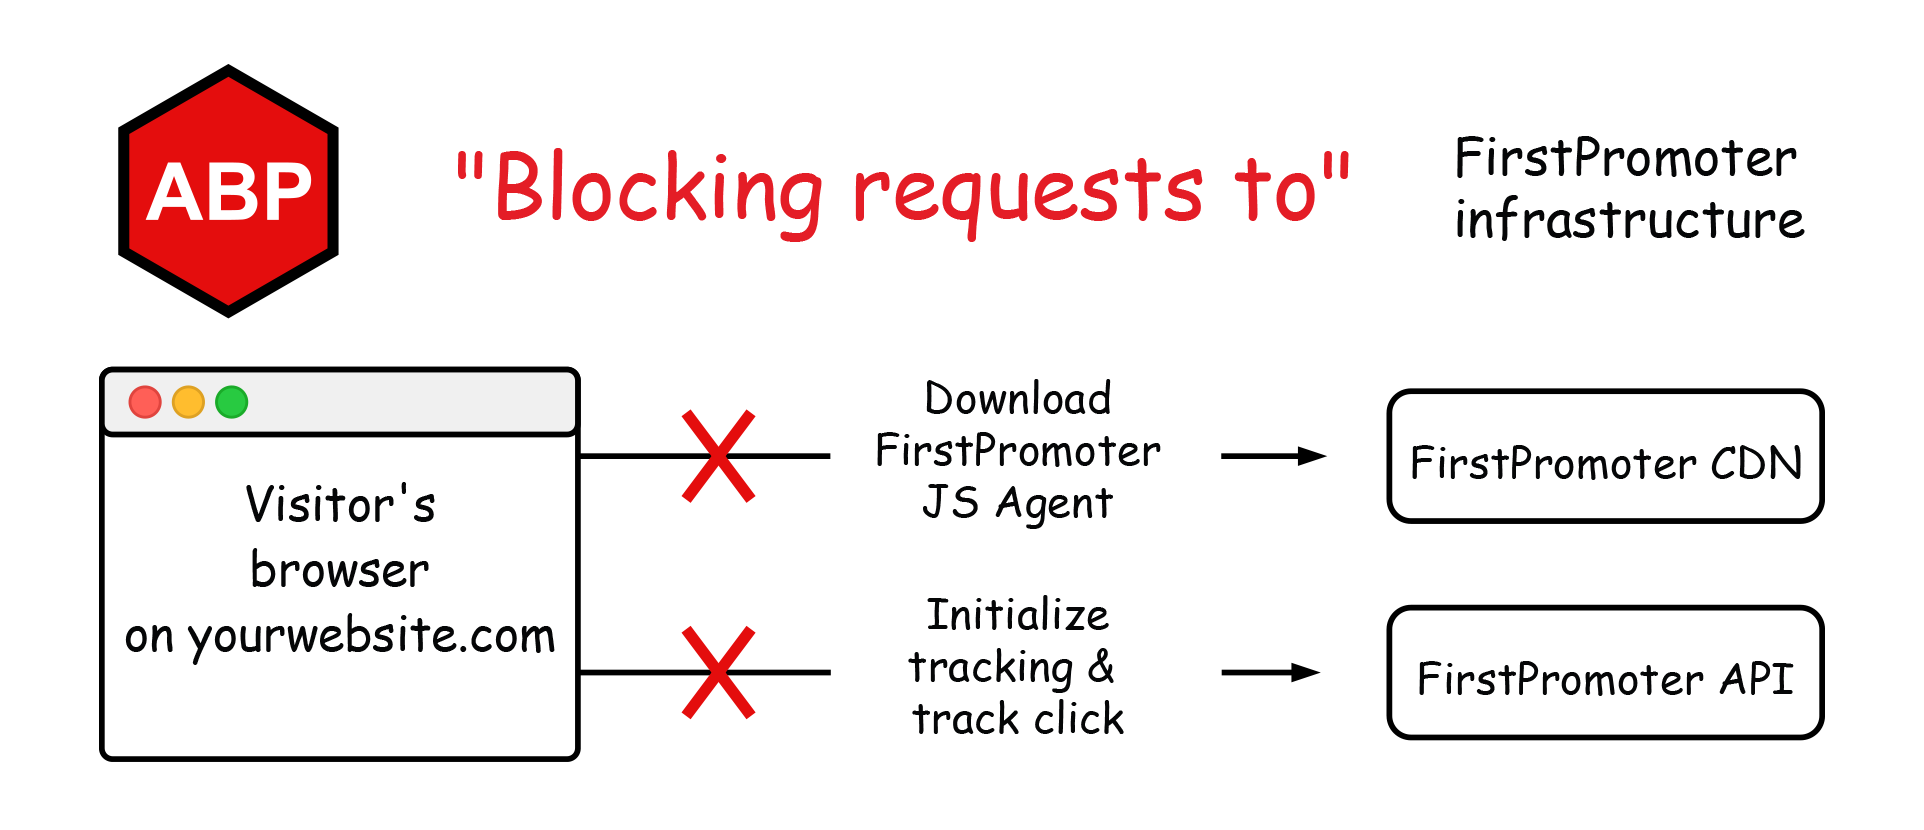
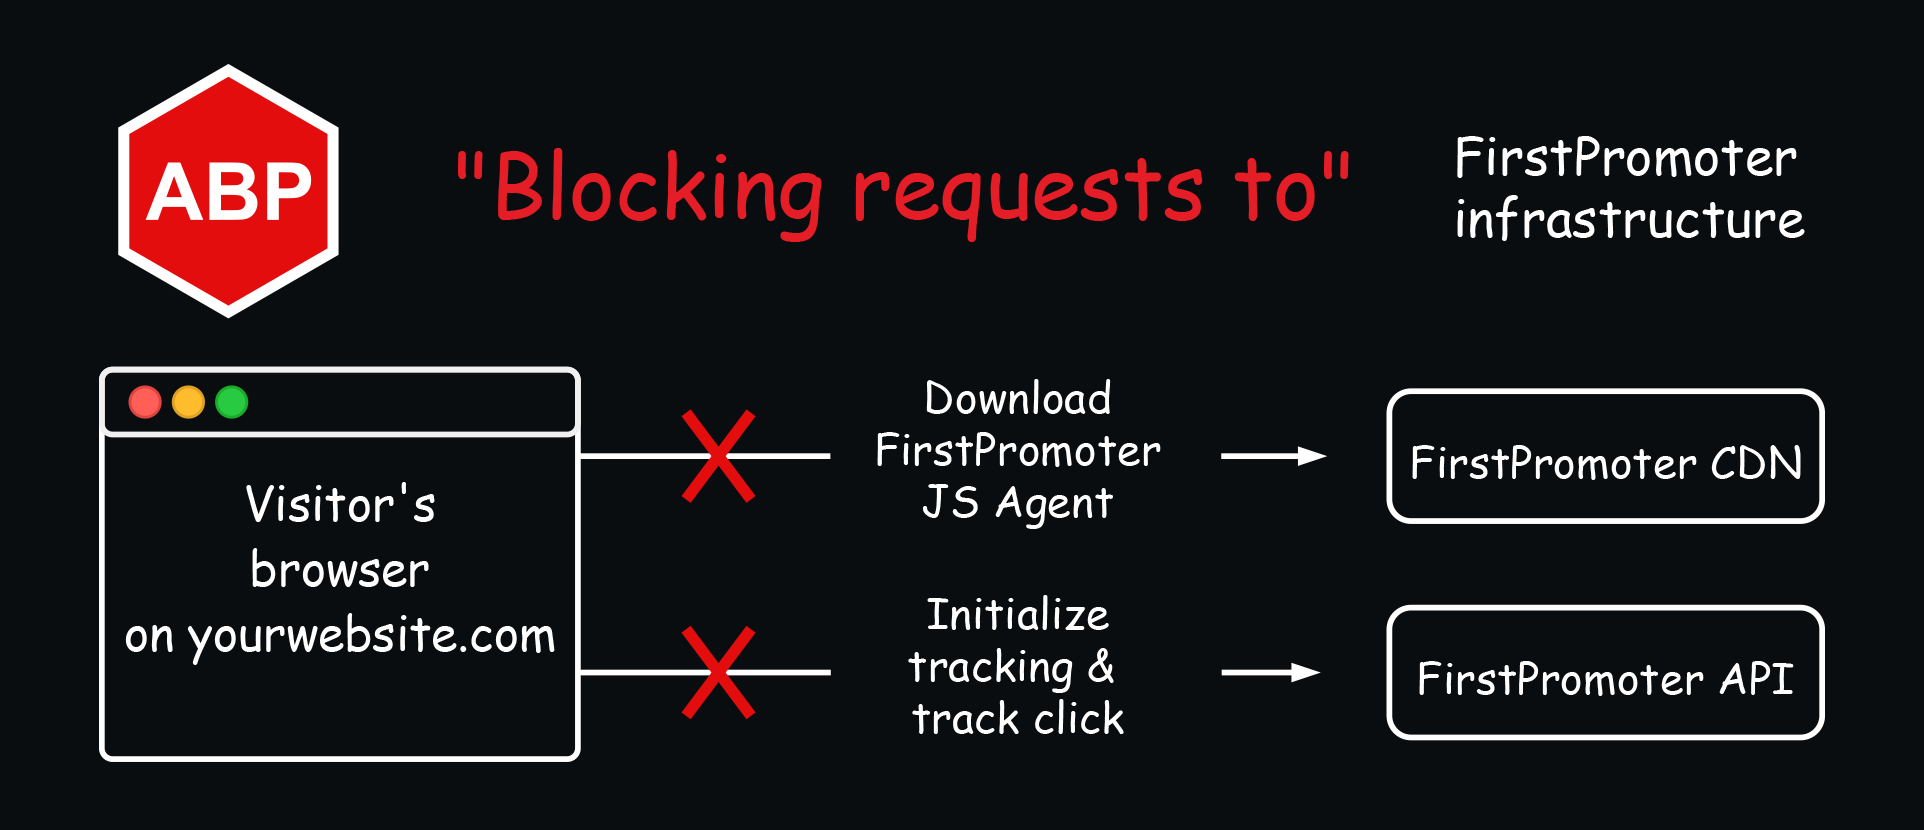 FirstPromoter, like many affiliate platforms, can be affected by these measures, resulting in lost attribution data and commission tracking failures.
Proxy Integration Solution
A proxy integration routes tracking requests through your own domain or a custom domain instead of directly to FirstPromoter’s tracking domain. This approach has several advantages:- Improved Deliverability: Requests appear to come from your trusted domain, not a third-party tracking service
- Reduced Blocking: Most ad blockers don’t block first-party requests
- Enhanced Privacy: User data stays within your domain ecosystem
- Better Performance: Removes additional DNS lookups to third-party domains
Implementation Methods
Method 1: Vercel redirect setup
If your service is hosted by Vercel, they provide an option to reroute your requests. To set up a Vercel redirect, follow these steps:- Find your vercel.json file. This is usually in your root directory.
- Add the following lines to your vercel.json file:
You can change the source paths to anything that you like. However you will need to update the URL’s in the tracking scripts as well.
For these we provide the following variables which you will use when setting up your scripts :
window.proxy_fpr_tr_url and window.proxy_fpr_get_details_url- Download the tracking scripts from here (Click here) and add it to your main website’s public directory. This will allow it to be fetched from your website. You can change the name of the file to anything but remember to rename it in the main tracking code below.
-
For your main tracking scripts, add the following code. Please replace
<your-account-id-here>with your actual account id in the settings > integrations page on your FirstPromoter dashboard. If you changed the urls to something more custom you can uncomment thewindow.proxy_fpr_tr_urlandwindow.proxy_fpr_get_details_urlvariables and update them to match your proxy urls.
- Deploy your changes and test using the brave browser or install uBlockOrigin and confirm if your tracking is working as expected
Method 2: Cloudflare workers setup
Cloudflare provides a free plan with up to 100,000 requests per day, making it a good choice for a reverse proxy setup. To set up a Cloudflare worker, follow these steps:-
Set up a Cloudflare Worker
Navigate to the Cloudflare dashboard, select
Compute (Workers)>Workers & Pages>Create. You can choose a custom name for your worker or use the default one. Click “Deploy” when ready.
Please take note of the url of your worker as this will be needed in your setup of the tracking scripts. - Modify the Worker for Proxy Functionality After deploying your new worker, click “Edit code”. If you’re already on the worker’s page, select “Quick edit”. This will open a code editor where you should replace the existing code with the following proxy code:
- When done, click “Save and deploy”.
- Download the tracking scripts from here (Click here) and add it to your main website’s public directory. This will allow it to be fetched from your website. You can change the name of the file to anything but remember to rename it in the main tracking code below.
-
For your main tracking scripts, add the following code. Please replace
<worker-url-here>with the url of your worker and<your-account-id-here>with your actual account id in the settings > integrations page on your FirstPromoter dashboard.
- Test using the brave browser or install uBlockOrigin and confirm if your tracking is working as expected
Method 3: Apache setup
- Find your apache config. Depending on your setup you may need to put the below in your default-ssl.conf file.
yourdomain.com/trwill be pointed tohttps://t.firstpromoter.com/trandyourdomain.com/tr/get_detailswill point tohttps://t.firstpromoter.com/get_details.
Feel free to change
/tr to anything you want on your domain if you do, you will be required to set the following in your script window.proxy_fpr_tr_url and window.proxy_fpr_get_details_urlFeel free to change
/tr and /tr/get_details to anything you want on your domain if you do, you will be required to set the following in your script window.proxy_fpr_tr_url and window.proxy_fpr_get_details_url-
Restart your server.
sudo service apache2 restart - Download the FirstPromoter scripts from here (Click here) and add it to your main websites public directory. This will allow it to be fetched from your website.
-
Add the scripts below directly to your website. Replace
<your-account-id-here>with your actual account id in the settings > integrations page on your FirstPromoter dashboard.
- Deploy and test using the brave browser or install uBlockOrigin and confirm if your tracking is working as expected.
Method 4: NGINX setup
- Find your NGINX config file. This is typically at:
/etc/nginx/sites-available/yourdomain.comOr if using a default site:/etc/nginx/sites-available/default
-
Restart your server.
sudo service nginx restart - Download the FirstPromoter scripts from here (Click here) and add it to your main website’s public directory. This will allow it to be fetched from your website.
-
Add the scripts below directly to your website. Replace
your-account-id-herewith your actual account id in the settings > integrations page on your FirstPromoter dashboard.
- Deploy and test using the brave browser or install uBlockOrigin and confirm if your tracking is working as expected